For non-Chinese readers:
I'm a software engineer in Shanghai, China. Since I bought a Raspberry Pi, I spent some spare time on it and I'm glad to share something with Pi users all over the world, so this article has two languages: Chinese & English, and I try to translate the Chinese to English as accurately as possible, but, there might be some translation mistakes, so if you don't know what I mean in the article, just leave a comment, and I'll reply when I get an answer. Also welcome to contact me via Email.
Raspberry Pi是什么?简单地说,它就是一个基于ARM CPU的、信用卡那么大的迷你计算机。
In short, Pi is an ARM-based mini computer which has a credit card size.
本文主要内容:
在Raspberry Pi上,通过调用OpenCV库,自己写一个简单的C程序来控制摄像头拍照,并保存图片。
在阅读本文之前,请确保你已经阅读过我的另一篇配置Pi的文章,因为本文是在它的基础上进行的。
The main content of this article:
Write a simple C program by invoking the OpenCV library on Raspberry Pi to control a webcam to take photos & save them.
Before reading this article, please make sure that you've read my another article about Pi configuration, because this article is based on that.
【1】安装OpenCV / Install OpenCV
命令:
Command:
pacman -S opencv opencv-samples
上面的命令连OpenCV的sample一起装上了,这样我们在安装好之后就可以编译几个sample来测试。
This command will install the samples of OpenCV, too. So we can compile & run several samples to have a test after the installation.
【2】带动摄像头 / Drive the webcam
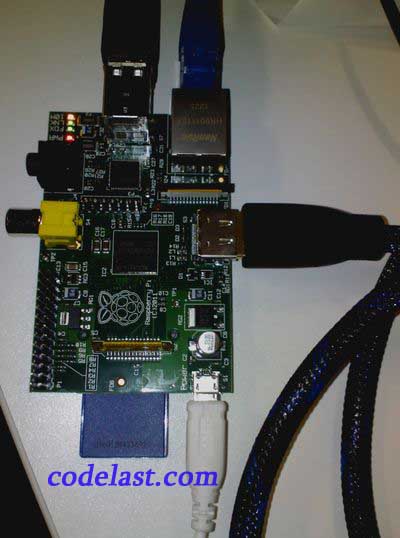
在驱动已经可用的情况下,把一个USB摄像头接在USB口上也不一定能让它工作,因为Pi的USB口的电流供应可能不足。请看这个链接的玩家自制的一根增强供电的USB线,如果你想简单安全,那么你可以把摄像头接在一个有外部供电的USB HUB上,再把Pi的USB接到USB HUB上,这样摄像头的供电就充足了。
Plug the USB webcam into the USB interface of Pi might not able to make it work, even the driver has been available, because the current provided by Pi's USB interface may not be sufficient to drive a camera. You can learn to DIY a current-enhancement USB cable via this link, but the easier way may be buying a powered USB HUB and use it to connect the webcam & Pi.
【3】让opencv的sample跑起来 / Run a sample of OpenCV
为了验证在Pi上安装的OpenCV是可用的,所以至少要让一个sample可以跑起来。
为了不把安装目录弄得一团乱,首先把安装好的OpenCV的sample目录拷贝到其他地方:
To make sure that the installed OpenCV related packages are "correct", I decided to run at least one of the OpenCV samples.
Copy the installed OpenCV sample directory to other place for the sake of not messing up the installation directory:
mkdir /root/opencv
cp -r /usr/share/OpenCV/samples/ /root/opencv/
我们看到里面有“c”,“cpp”和“gpu”三种sample,选最简单的,我们进入“c”,先为所有文件加上写权限:
There are 3 kinds of samples in it, "c", "cpp" & "gpu", so I choose the simplest - "c", and enter the "c" directory, add write permission to all files:
chmod +w *
然后我们看到“c”目录里有编译脚本 build_all.sh,执行它,看到出了一堆相似的错误,没有一个程序可以成功编译,例如以下错误:
Execute the build_all.sh script to compile an sample, then I got lots of similar errors, e.g. :
[root@alarmpi c]# ./build_all.sh contours.ccompiling contours/usr/bin/ld: /tmp/cch4zRSn.o: undefined reference to symbol 'lrint@@GLIBC_2.4'/usr/bin/ld: note: 'lrint@@GLIBC_2.4' is defined in DSO /usr/lib/libm.so.6 so try adding it to the linker command line/usr/lib/libm.so.6: could not read symbols: Invalid operationcollect2: error: ld returned 1 exit status
The "libm" told me that the math library was not included in the compiling command, so I edited build_all.sh and add -lm to all compiling command:
#!/bin/sh

if [ $# -gt 0 ] ; then
        base=`basename $1 .c`
        echo "compiling $base"
        gcc -ggdb `pkg-config opencv --cflags --libs` $base.c -o $base -lm
else
        for i in *.c; do
            echo "compiling $i"
            gcc -ggdb `pkg-config --cflags opencv` -o `basename $i .c` $i `pkg-config --libs opencv` -lm;
        done
        for i in *.cpp; do
            echo "compiling $i"
            g++ -ggdb `pkg-config --cflags opencv` -o `basename $i .cpp` $i `pkg-config --libs opencv` -lm;
        done
fi
文章来源:http://www.codelast.com/
还忘了说一句,由于上面的脚本在编译时使用了pkg-config,所以在编译前,我们还需要先安装 pkg-config:
Sorry, I forget to mention that because of using pkg-config, we need to install pkg-config before compiling the sample:
pacman -S pkg-config
然后再编译,成功。
Then the compiling will succeed.
那么下面,我们再接着尝试把编译出的sample运行起来:
Then run the executable program we just compiled:
[root@alarmpi c]# ./contours

This program creates an image to demonstrate the use of the "c" contour
functions: cvFindContours() and cvApproxPoly() along with the storage
functions cvCreateMemStorage() and cvDrawContours().
It also shows the use of a trackbar to control contour retrieval.

Usage :
./contours

(image:460): Gtk-WARNING **: cannot open display:
很明显,运行不起来。
看样子是跟gtk相关,并且我在网上搜到这跟X server什么的可能有关系,于是安装gtk和X server:
It failed, unfortunately.
And Google told me that the error is related to X server, too, so I installed gtk & X server:
pacman -S gtk xorg-server
再修改配置文件 /etc/ssh/sshd_config :
Modify the config file /etc/ssh/sshd_config :
#AllowTcpForwarding yes
AllowTcpForwarding yes
#GatewayPorts no
#X11Forwarding no
X11Forwarding yes
#X11DisplayOffset 10
#X11UseLocalhost yes
X11UseLocalhost yes
注意,没有注释的那三行是我添加的。
Note that the 3 uncommented lines are added by me.
文章来源:http://www.codelast.com/
重启Pi的系统,运行X server:
Reboot Pi & run X server:
X
没错,命令就是这么简单。然后又出错了:
Yes, the command is just so simple, but it failed to start:
[root@alarmpi c]# XX.Org X Server 1.13.0Release Date: 2012-09-05X Protocol Version 11, Revision 0Build Operating System: Linux 3.0.15-1-ARCH+ armv6lCurrent Operating System: Linux alarmpi 3.2.27-11-ARCH+ #1 PREEMPT Sat Oct 13 22:46:16 UTC 2012 armv6lKernel command line: dma.dmachans=0x7f35 bcm2708_fb.fbwidth=1920 bcm2708_fb.fbheight=1080 bcm2708.boardrev=0x3 bcm2708.serial=0x398ca41f smsc95xx.macaddr=B8:27:EB:8C:A4:1F vc_mem.mem_base=0xc000000 vc_mem.mem_size=0x10000000 sdhci-bcm2708.enable_llm=1 sdhci-bcm2708.sync_after_dma=0 smsc95xx.turbo_mode=N dwc_otg.lpm_enable=0 console=ttyAMA0,115200 kgdboc=ttyAMA0,115200 console=tty1 loglevel=2 root=/dev/mmcblk0p2 init=/bin/systemd rootfstype=ext4 rootwaitBuild Date: 14 October 2012 10:05:22PMCurrent version of pixman: 0.26.2Before reporting problems, check http://wiki.x.orgto make sure that you have the latest version.Markers: (--) probed, (**) from config file, (==) default setting,(++) from command line, (!!) notice, (II) informational,(WW) warning, (EE) error, (NI) not implemented, (??) unknown.(==) Log file: "/var/log/Xorg.0.log", Time: Mon Oct 15 14:30:03 2012(==) Using config directory: "/etc/X11/xorg.conf.d"Initializing built-in extension Generic Event ExtensionInitializing built-in extension SHAPEInitializing built-in extension MIT-SHMInitializing built-in extension XInputExtensionInitializing built-in extension XTESTInitializing built-in extension BIG-REQUESTSInitializing built-in extension SYNCInitializing built-in extension XKEYBOARDInitializing built-in extension XC-MISCInitializing built-in extension SECURITYInitializing built-in extension XINERAMAInitializing built-in extension XFIXESInitializing built-in extension RENDERInitializing built-in extension RANDRInitializing built-in extension COMPOSITEInitializing built-in extension DAMAGEInitializing built-in extension MIT-SCREEN-SAVERInitializing built-in extension DOUBLE-BUFFERInitializing built-in extension RECORDInitializing built-in extension DPMSInitializing built-in extension X-ResourceInitializing built-in extension XVideoInitializing built-in extension XVideo-MotionCompensationInitializing built-in extension XFree86-VidModeExtensionInitializing built-in extension XFree86-DGAInitializing built-in extension XFree86-DRIInitializing built-in extension DRI2Loading extension GLXFatal server error:no screens found(EE)Please consult the The X.Org Foundation supportat http://wiki.x.orgfor help.(EE) Please also check the log file at "/var/log/Xorg.0.log" for additional information.(EE)Server terminated with error (1). Closing log file.
既然它让我看日志文件 /var/log/Xorg.0.log,那我就看。在日志文件的最后,发现提示找不到 fbdev 模块/库,于是翻遍Google,找到一个答案:应该安装 xf86-video-fbdev 包:
Since it told me to check log file /var/log/Xorg.0.log, then I did. At the last few lines of the log file, I found an error message which indicated a fbdev module/lib missing, so I ask Google again for a while, and I realized that I should install package xf86-video-fbdev:
pacman -S xf86-video-fbdev
文章来源:http://www.codelast.com/
再用“X”命令启动X server,成功了:
Then run "X" again, it succeeded:
[root@alarmpi ~]# XX.Org X Server 1.13.0Release Date: 2012-09-05X Protocol Version 11, Revision 0Build Operating System: Linux 3.0.15-1-ARCH+ armv6lCurrent Operating System: Linux alarmpi 3.2.27-11-ARCH+ #1 PREEMPT Sat Oct 13 22:46:16 UTC 2012 armv6lKernel command line: dma.dmachans=0x7f35 bcm2708_fb.fbwidth=1920 bcm2708_fb.fbheight=1080 bcm2708.boardrev=0x3 bcm2708.serial=0x398ca41f smsc95xx.macaddr=B8:27:EB:8C:A4:1F vc_mem.mem_base=0xc000000 vc_mem.mem_size=0x10000000 sdhci-bcm2708.enable_llm=1 sdhci-bcm2708.sync_after_dma=0 smsc95xx.turbo_mode=N dwc_otg.lpm_enable=0 console=ttyAMA0,115200 kgdboc=ttyAMA0,115200 console=tty1 loglevel=2 root=/dev/mmcblk0p2 init=/bin/systemd rootfstype=ext4 rootwaitBuild Date: 14 October 2012 10:05:22PMCurrent version of pixman: 0.26.2Before reporting problems, check http://wiki.x.orgto make sure that you have the latest version.Markers: (--) probed, (**) from config file, (==) default setting,(++) from command line, (!!) notice, (II) informational,(WW) warning, (EE) error, (NI) not implemented, (??) unknown.(==) Log file: "/var/log/Xorg.0.log", Time: Mon Oct 15 14:32:34 2012(==) Using config directory: "/etc/X11/xorg.conf.d"Initializing built-in extension Generic Event ExtensionInitializing built-in extension SHAPEInitializing built-in extension MIT-SHMInitializing built-in extension XInputExtensionInitializing built-in extension XTESTInitializing built-in extension BIG-REQUESTSInitializing built-in extension SYNCInitializing built-in extension XKEYBOARDInitializing built-in extension XC-MISCInitializing built-in extension SECURITYInitializing built-in extension XINERAMAInitializing built-in extension XFIXESInitializing built-in extension RENDERInitializing built-in extension RANDRInitializing built-in extension COMPOSITEInitializing built-in extension DAMAGEInitializing built-in extension MIT-SCREEN-SAVERInitializing built-in extension DOUBLE-BUFFERInitializing built-in extension RECORDInitializing built-in extension DPMSInitializing built-in extension X-ResourceInitializing built-in extension XVideoInitializing built-in extension XVideo-MotionCompensationInitializing built-in extension XFree86-VidModeExtensionInitializing built-in extension XFree86-DGAInitializing built-in extension XFree86-DRIInitializing built-in extension DRI2Loading extension GLX
文章来源:http://www.codelast.com/
再试着运行OpenCV的sample,依然不行,Google搜索到一篇在Pi上运行OpenCV的文章,作者做了这样一件事情:
Then I tried to run the OpenCV sample again, still the same error("cannot open display"), so I Googled another article about using OpenCV on Pi and found that the author did one thing:
export DISPLAY=192.168.3.65:0.0
其中,192.168.3.65是Pi的IP地址。这样设置之后,再运行,程序不再报错了!再一看相同的目录下,生成了一个 contours.xml 文件,说明程序执行成功了。
In which the "192.168.3.65" is your Pi's IP address. After setting this, the sample could run without any error occurred, and a contours.xml file was generated under the same directory, which indicated that we succeeded.
【4】写一个简单的OpenCV C程序 / Write a simple OpenCV C program
现在该写一个简单的OpenCV C程序来控制摄像头了。
Now we should write a simple C program to control the webcam by using OpenCV.
直接看程序:
Let's check the C code:
#include <stdio.h>
#include <stdlib.h>
#include "highgui.h"
#include "opencv.hpp"

int main(int argc, char **argv) {
	/* init camera */
	CvCapture* pCapture = cvCreateCameraCapture(0);
	cvSetCaptureProperty(pCapture, CV_CAP_PROP_FRAME_WIDTH, 320);
	cvSetCaptureProperty(pCapture, CV_CAP_PROP_FRAME_HEIGHT, 240);
	//cvSetCaptureProperty(pCapture, CV_CAP_PROP_FPS, 5);

	IplImage *pFrame = 0;

	if (NULL == pCapture) {
		fprintf(stderr, "Can't initialize webcam!\n");
		return 1;
	}

	pFrame = cvQueryFrame(pCapture);	// query a frame

	if(NULL == pFrame) {
		fprintf(stderr, "Can't get a frame!\n" );
		return 1;
	}

	const char *pImageFileName = "webcam.jpg";
	cvSaveImage(pImageFileName, pFrame);

	cvReleaseCapture(&pCapture);	// free memory

	return 0;
}
此程序做的事情非常简单:初始化摄像头,抓取一帧,然后保存为名为“webcam.jpg”的图片。
This program does a very simple job: initialize the camera, capture a frame & save it to a image file named "webcam.jpg".
文章来源:http://www.codelast.com/
编译自己的webcam程序:
Then compile the webcam program:
g++ -I/usr/include/opencv/ -I/usr/include/opencv2/ `pkg-config --cflags opencv --libs opencv` webcam.c -o webcam
会生成一个可执行程序“webcam”,运行它:
This will generate an executable bin "webcam", just run it:
./webcam
然后在相同目录下,会看到生成了一个“webcam.jpg”图片,正是摄像头拍的照。
Then we'll get a "webcam.jpg" image file under the same directory, which is just the photo took by the camera.
这样,本文的主要目的就达成了。可以在此基础上继续开发其他的程序,来实现更为有用的功能,例如像摄像头娘一样的运动检测功能。
So the main purpose of this article has been reached. We can develop more useful programs base on it, e.g. a program similar to the Camera Girl, which implements the motion detection functionality.
文章来源:http://www.codelast.com/
【5】遗留问题 / Unsolved problems
在上述过程中,其实我还遇到了一些未解决的问题,暂时没有时间深究,在此先记录如下。
In the above process I met some unsolved problems and have no time to explore them yet, so I just write them down here for further study.
①拍照时使用稍高的分辨率就导致程序崩溃 / Use a little high resolution will cause the program crash
在上面的程序中,如下两句是用于设置分辨率的(宽*高):
In the above codes, the two lines below are used to set the resolution:
cvSetCaptureProperty(pCapture, CV_CAP_PROP_FRAME_WIDTH, 320);
cvSetCaptureProperty(pCapture, CV_CAP_PROP_FRAME_HEIGHT, 240);
根据我的试验,160*120的低分辨率比较少出问题,尽管320*240的分辨率对摄像头来说也根本不算高的,但是就算是使用320*240的分辨率,程序还是偶尔会崩溃的,报错如下:
According to my experiments, the 160*120 low resolution cause less crashes than higher resolutions. Even 320*240 is not a high resolution for a webcam nowadays, it still made the program crashed some times, and the error messages are:
[root@alarmpi c]# ./webcam
VIDIOC_QUERYMENU: Invalid argument
VIDIOC_QUERYMENU: Invalid argument
VIDIOC_QUERYMENU: Invalid argument
VIDIOC_REQBUFS: Cannot allocate memory
munmap: Invalid argument
munmap: Invalid argument
munmap: Invalid argument
munmap: Invalid argument
Unable to stop the stream.: Bad file descriptor
munmap: Invalid argument
munmap: Invalid argument
munmap: Invalid argument
munmap: Invalid argument
HIGHGUI ERROR: V4L: Initial Capture Error: Unable to load initial memory buffers.
Can't get a frame!
文章来源:http://www.codelast.com/
或者:
Or:
VIDIOC_REQBUFS: Cannot allocate memory
HIGHGUI ERROR: V4L/V4L2: Could not obtain specifics of capture window.

Unable to stop the stream.: Bad file descriptor
VIDIOC_QBUF: Bad file descriptor
Can't get a frame!
我不确定这是跟Pi的CPU计算能力较弱有关呢,还是跟Pi的RAM太小有关呢,还是跟摄像头的供电不足有关呢(我没有使用带电源的USB HUB来接摄像头),或者是跟摄像头的驱动有关呢?
如果你知道解决办法,请赐教,非常感谢。
I'm not sure whether the problem is caused by the weak computation capability of Pi's CPU, or the too-small RAM on Pi, or the insufficient current supply of the webcam(I didn't use a powered USB HUB to connect the webcam to Pi), or the webcam's Linux driver...
If you know something, please tell me and thank you in advance.
2015-02-19更新:
在树莓派model B+上,使用OpenCV 2.4.10版的上述程序,已经没有了上面所说的问题,经我测试,每隔2秒一次,连续抓取了将近30分钟的图像,一次都没有问题。
文章来源:https://www.codelast.com/
➤➤ 版权声明 ➤➤
转载需注明出处:codelast.com
感谢关注我的微信公众号(微信扫一扫):

你的网站真的是很棒!
我自己也在VPS上搭建了一个网站,用的也是WordPress,但是
没有你的主题好看,还有想请教一下为什么你的主题中可以显示代码行数,格式很好看,是安装插件了吗还是自带的?
最近也打算在业余时间折腾一下树莓派,看到你的网站简直如获至宝,
哈哈哈哈,感觉我们很像,这是一种直觉。希望多交流!
CK and SyntaxHighlighter 插件
楼主,你好,我最近也在用树莓派,opencv3.0,python2.7做拍照的功能,出现和楼主类似的问题,当我把照片分辨率设为320*240的时候,程序拍摄2次左右就崩溃了,分辨率设为100*100的时候,拍摄8次左右,程序就崩溃了,我怀疑是缓存没有清除,可是我程序里有清除缓存的程序啊。楼主后来说2.0的版本没问题了,那是什么原因呢,和你隔2秒有关系吗/
没用过Python来调用OpenCV,不确定是什么问题。
不过我觉得树莓派3代这种问题可能会比较少了,因为性能有了很大的提高,如果可以的话,还是换新吧,毕竟旧版早已淘汰。
excellent !
楼主你好,这里的USB摄像头是一般的都可以吗? 哪里可以买到呢
绝对是一般的摄像头,我依稀记得我买的摄像头就20多块钱,便宜得不能再便宜了。所以随便买一个就行了
哈哈,成功了~不过我的一般都会捕捉成功, 但每次都会报:
VIDIOC_QUERYMENU: Invalid argument
VIDIOC_QUERYMENU: Invalid argument
VIDIOC_QUERYMENU: Invalid argument
VIDIOC_QUERYMENU: Invalid argument
试了一下更高的分辨率,比如800*600,虽然也能拍照成功,但是图片显示的不正常。。
我也没接HUB