OS:Ubuntu 14.04
在台式机上执行ELL的demo程序 cntkDemo.py 时,可能会遇到程序僵死的问题。
cntkDemo.py 这个程序会调用OpenCV,在一个GUI窗口中显示USB摄像头拍摄的实时视频流,而僵死的现象正是:执行到弹出GUI窗口显示摄像头拍摄的视频流的代码的时候,程序进入僵死状态,不能执行后续逻辑。此时,只能Ctrl+C终止掉程序。
我的Ubuntu 14.04是一台老爷机,性能非常差,我觉得这有可能程序僵死的原因之一?我试了几次都是这样,于是我打算换一个思路来跑这个demo,不再纠结于解决窗口僵死的问题。
文章来源:https://www.codelast.com/
先来看一下原版的 cntkDemo.py 部分代码:
    while (True):
        # Grab next frame
        ret, frame = cap.read()

        # Prepare the image to send to the model.
        # This involves scaling to the required input dimension and re-ordering from BGR to RGB
        data = helper.prepare_image_for_predictor(frame)

        # Get the model to classify the image, by returning a list of probabilities for the classes it can detect
        predictions = model.Predict(data)

        # Get the (at most) top 5 predictions that meet our threshold. This is returned as a list of tuples,
        # each with the text label and the prediction score.
        top5 = helper.get_top_n(predictions, 5)

        # Turn the top5 into a text string to display
        text = "".join([str(element[0]) + "(" + str(int(100*element[1])) + "%)  " for element in top5])

        # Draw the text on the frame
        frameToShow = frame
        helper.draw_label(frameToShow, text)
        helper.draw_fps(frameToShow)

        # Show the new frame
        cv2.imshow('frame', frameToShow)

        # Wait for Esc key
        if cv2.waitKey(1) & 0xFF == 27:
            break
这段代码的注释非常清晰,它的功能是:在一个无限循环中,不断地去抓取USB摄像头拍摄的一帧图像,然后用model预测其分类及概率,最后再把预测结果叠加显示在GUI窗口中,类似于下面这样:
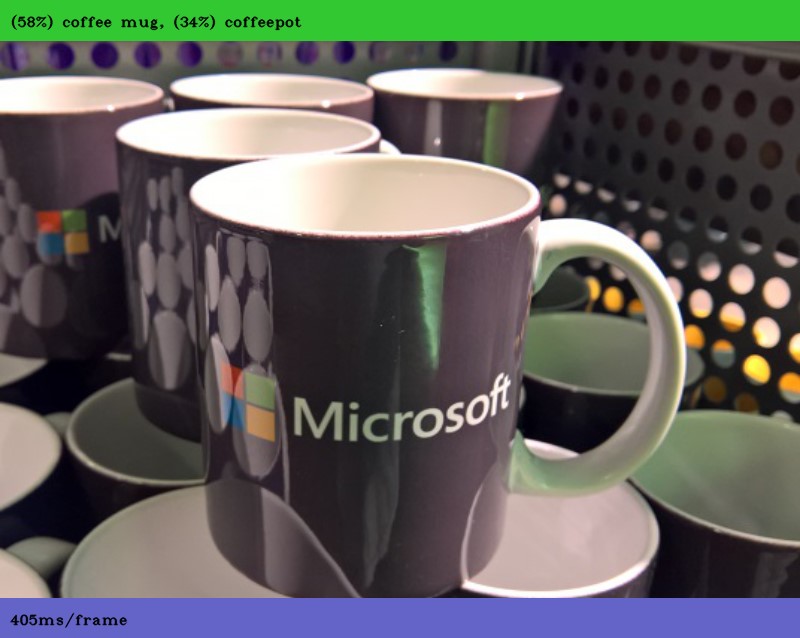
既然 cntkDemo.py 主要是为了测试model能不能正常跑,那么我在命令行以文字形式显示预测结果也是一样的啊,没有必要非得在GUI窗口中展示。
文章来源:https://www.codelast.com/
于是我把程序改成了下面这样(完整程序):
import sys
import os
import numpy as np
import cv2
import time

import findEll
import cntk_to_ell
import modelHelper as mh

def get_ell_predictor(modelConfig):
    """Imports a model and returns an ELL.Predictor."""
    return cntk_to_ell.predictor_from_cntk_model(modelConfig.model_files[0])

def main():

    if (not os.path.exists('VGG16_ImageNet_Caffe.model')):
        print("Please download the 'VGG16_ImageNet_Caffe.model' file, see README.md")
        sys.exit(1)

    # ModelConfig for VGG16 model from CNTK Model Gallery
    # Follow the instructions in README.md to download the model if you intend to use it.
    helper = mh.ModelHelper("VGG16ImageNet", ["VGG16_ImageNet_Caffe.model"], "cntkVgg16ImageNetLabels.txt", scaleFactor=1.0)

    # Import the model
    model = get_ell_predictor(helper)

    # Save the model
    helper.save_ell_predictor_to_file(model, "vgg16ImageNet.map")

    camera = 0
    if (len(sys.argv) > 1):
        camera = int(sys.argv[1])

    # Start video capture device
    cap = cv2.VideoCapture(camera)

    while (True):
        print('Read a frame from camera...')
        ret, frame = cap.read()

        # Prepare the image to send to the model.
        # This involves scaling to the required input dimension and re-ordering from BGR to RGB
        data = helper.prepare_image_for_predictor(frame)

        # Get the model to classify the image, by returning a list of probabilities for the classes it can detect
        predictions = model.Predict(data)

        # Get the (at most) top 5 predictions that meet our threshold. This is returned as a list of tuples,
        # each with the text label and the prediction score.
        top5 = helper.get_top_n(predictions, 5)

        # Turn the top5 into a text string to display
        text = "".join([str(element[0]) + "(" + str(int(100*element[1])) + "%)  " for element in top5])

        # Output the text on command line
        print(text)

if __name__ == "__main__":
    main()
其中最关键的是,不再用 cv2.imshow() 的方式来弹出GUI窗口,而是用 print(text) 的方式把结果打印到command line。
经过实测,在我的老爷机上这个程序就完全不会僵死了。此时,你把摄像头对准哪个物体,它拍摄的就是哪个物体的图像,model也就是对这个物体的图像进行分类预测。
文章来源:https://www.codelast.com/
下面是我的一次test的command line输出:
OpenBLAS : Your OS does not support AVX instructions. OpenBLAS is using Nehalem kernels as a fallback, which may give poorer performance.Read a frame from camera, time 1Frame 1 saved to diskRead a frame from camera, time 2Frame 2 saved to diskRead a frame from camera, time 3Frame 3 saved to diskRead a frame from camera, time 4Frame 4 saved to diskRead a frame from camera, time 5Frame 5 saved to diskLoading...Selected CPU as the process wide default device.Finished loading.Pre-processing...Will not process Dropout - skipping this layer as irrelevant.Will not process Dropout - skipping this layer as irrelevant.Will not process Combine - skipping this layer as irrelevant.Convolution : 226x226x3 -> 224x224x64 | padding 1ReLU : 224x224x64 -> 226x226x64 | padding 0Convolution : 226x226x64 -> 224x224x64 | padding 1ReLU : 224x224x64 -> 224x224x64 | padding 0Pooling : 224x224x64 -> 114x114x64 | padding 0Convolution : 114x114x64 -> 112x112x128 | padding 1ReLU : 112x112x128 -> 114x114x128 | padding 0Convolution : 114x114x128 -> 112x112x128 | padding 1ReLU : 112x112x128 -> 112x112x128 | padding 0Pooling : 112x112x128 -> 58x58x128 | padding 0Convolution : 58x58x128 -> 56x56x256 | padding 1ReLU : 56x56x256 -> 58x58x256 | padding 0Convolution : 58x58x256 -> 56x56x256 | padding 1ReLU : 56x56x256 -> 58x58x256 | padding 0Convolution : 58x58x256 -> 56x56x256 | padding 1ReLU : 56x56x256 -> 56x56x256 | padding 0Pooling : 56x56x256 -> 30x30x256 | padding 0Convolution : 30x30x256 -> 28x28x512 | padding 1ReLU : 28x28x512 -> 30x30x512 | padding 0Convolution : 30x30x512 -> 28x28x512 | padding 1ReLU : 28x28x512 -> 30x30x512 | padding 0Convolution : 30x30x512 -> 28x28x512 | padding 1ReLU : 28x28x512 -> 28x28x512 | padding 0Pooling : 28x28x512 -> 16x16x512 | padding 0Convolution : 16x16x512 -> 14x14x512 | padding 1ReLU : 14x14x512 -> 16x16x512 | padding 0Convolution : 16x16x512 -> 14x14x512 | padding 1ReLU : 14x14x512 -> 16x16x512 | padding 0Convolution : 16x16x512 -> 14x14x512 | padding 1ReLU : 14x14x512 -> 14x14x512 | padding 0Pooling : 14x14x512 -> 7x7x512 | padding 0linear : 7x7x512 -> 1x1x4096 | padding 0ReLU : 1x1x4096 -> 1x1x4096 | padding 0linear : 1x1x4096 -> 1x1x4096 | padding 0ReLU : 1x1x4096 -> 1x1x4096 | padding 0linear : 1x1x4096 -> 1x1x1000 | padding 0Softmax : 1x1x1000 -> 1x1x1000 | padding 0Finished pre-processing.Constructing equivalent ELL layers from CNTK...Converting layer conv1_1: Convolution(data: Tensor[3,224,224]) -> Tensor[64,224,224]Converting layer relu1_1: ReLU(conv1_1: Tensor[64,224,224]) -> Tensor[64,224,224]Converting layer conv1_2: Convolution(relu1_1: Tensor[64,224,224]) -> Tensor[64,224,224]Converting layer relu1_2: ReLU(conv1_2: Tensor[64,224,224]) -> Tensor[64,224,224]Converting layer pool1: Pooling(relu1_2: Tensor[64,224,224]) -> Tensor[64,112,112]Converting layer conv2_1: Convolution(pool1: Tensor[64,112,112]) -> Tensor[128,112,112]Converting layer relu2_1: ReLU(conv2_1: Tensor[128,112,112]) -> Tensor[128,112,112]Converting layer conv2_2: Convolution(relu2_1: Tensor[128,112,112]) -> Tensor[128,112,112]Converting layer relu2_2: ReLU(conv2_2: Tensor[128,112,112]) -> Tensor[128,112,112]Converting layer pool2: Pooling(relu2_2: Tensor[128,112,112]) -> Tensor[128,56,56]Converting layer conv3_1: Convolution(pool2: Tensor[128,56,56]) -> Tensor[256,56,56]Converting layer relu3_1: ReLU(conv3_1: Tensor[256,56,56]) -> Tensor[256,56,56]Converting layer conv3_2: Convolution(relu3_1: Tensor[256,56,56]) -> Tensor[256,56,56]Converting layer relu3_2: ReLU(conv3_2: Tensor[256,56,56]) -> Tensor[256,56,56]Converting layer conv3_3: Convolution(relu3_2: Tensor[256,56,56]) -> Tensor[256,56,56]Converting layer relu3_3: ReLU(conv3_3: Tensor[256,56,56]) -> Tensor[256,56,56]Converting layer pool3: Pooling(relu3_3: Tensor[256,56,56]) -> Tensor[256,28,28]Converting layer conv4_1: Convolution(pool3: Tensor[256,28,28]) -> Tensor[512,28,28]Converting layer relu4_1: ReLU(conv4_1: Tensor[512,28,28]) -> Tensor[512,28,28]Converting layer conv4_2: Convolution(relu4_1: Tensor[512,28,28]) -> Tensor[512,28,28]Converting layer relu4_2: ReLU(conv4_2: Tensor[512,28,28]) -> Tensor[512,28,28]Converting layer conv4_3: Convolution(relu4_2: Tensor[512,28,28]) -> Tensor[512,28,28]Converting layer relu4_3: ReLU(conv4_3: Tensor[512,28,28]) -> Tensor[512,28,28]Converting layer pool4: Pooling(relu4_3: Tensor[512,28,28]) -> Tensor[512,14,14]Converting layer conv5_1: Convolution(pool4: Tensor[512,14,14]) -> Tensor[512,14,14]Converting layer relu5_1: ReLU(conv5_1: Tensor[512,14,14]) -> Tensor[512,14,14]Converting layer conv5_2: Convolution(relu5_1: Tensor[512,14,14]) -> Tensor[512,14,14]Converting layer relu5_2: ReLU(conv5_2: Tensor[512,14,14]) -> Tensor[512,14,14]Converting layer conv5_3: Convolution(relu5_2: Tensor[512,14,14]) -> Tensor[512,14,14]Converting layer relu5_3: ReLU(conv5_3: Tensor[512,14,14]) -> Tensor[512,14,14]Converting layer pool5: Pooling(relu5_3: Tensor[512,14,14]) -> Tensor[512,7,7]Converting layer fc6: linear(pool5: Tensor[512,7,7]) -> Tensor[4096]Converting layer relu6: ReLU(fc6: Tensor[4096]) -> Tensor[4096]Converting layer fc7: linear(drop6: Tensor[4096]) -> Tensor[4096]Converting layer relu7: ReLU(fc7: Tensor[4096]) -> Tensor[4096]Converting layer fc8: linear(drop7: Tensor[4096]) -> Tensor[1000]Converting layer prob: Softmax(fc8: Tensor[1000]) -> Tensor[1000]...Finished constructing ELL layers.lighter, light, igniter, ignitor(28%)lighter, light, igniter, ignitor(28%)lighter, light, igniter, ignitor(32%)lighter, light, igniter, ignitor(30%)......
最后不得不感叹一下,我的台式机真的是太老了,跑这个demo真的很慢,没有个5分钟以上是根本没可能到开始预测的步骤的。
文章来源:https://www.codelast.com/
➤➤ 版权声明 ➤➤
转载需注明出处:codelast.com
感谢关注我的微信公众号(微信扫一扫):